How to Use Your TV as a Computer Monitor
High-end desktop monitors can take a serious toll on your budget. If you are shopping for a screen tailored to PC gaming, video editing, or digital art, prices escalate rapidly—especially when looking at 4K panels, ultra-wide designs, or OLED technology.
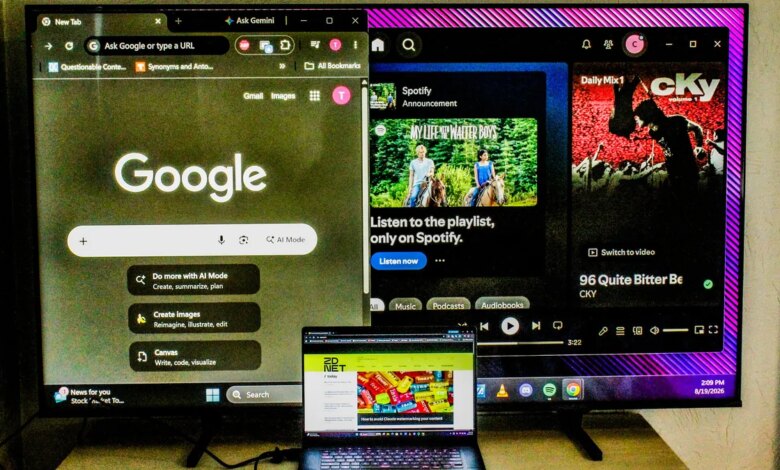
Fortunately, you may already own a viable replacement. Transforming a TV into a computer monitor is a straightforward way to expand your screen real estate without overspending. Whether you need a temporary backup display, a multi-monitor addition, or a primary screen for work and entertainment, connecting your television to a desktop or laptop is easy to set up across Windows, macOS, ChromeOS, and Linux.
Simple Ways to Connect Your TV to a PC
Wired Connections
The most dependable method for linking a computer to a television is a standard HDMI cable. Once physically attached, switching your TV’s input channel to the corresponding HDMI port will mirror your computer’s screen instantly.
If your laptop or desktop lacks an HDMI port and relies on USB-C, Thunderbolt, or DisplayPort outputs, you will need a basic adapter:


- DisplayPort-to-HDMI or USB-C-to-HDMI adapters generally cost between $10 and $15.
- Keep in mind that standard HDMI protocols apply even when using these adapters, meaning you will not get the higher data transmission speeds native to DisplayPort or Thunderbolt connections.
Wireless Streaming and Remote Access
If running cables across the room is inconvenient, wireless screen mirroring is an alternative. Most modern smart TVs include built-in support for systems like Apple AirPlay or Google Cast. However, wireless streaming compresses video and audio, which often introduces noticeable input lag and reduced screen clarity.
Certain modern televisions, such as those from Samsung or LG, offer dedicated Remote PC applications. These tools allow you to access your desktop over your home network by connecting to your computer’s IP address.
How to Find Your IP Address Across Operating Systems
- Windows: Press the Windows Key, type
cmdto open the Command Prompt, and enteripconfigto locate your IPv4 address. Alternatively, navigate to Start > Settings > Network & Internet, select your active connection, and scroll down to view network details. - Mac: Go to Apple Menu > System Settings > Network, click your connected Wi-Fi or Ethernet network, and open Details to locate your IP address.
- ChromeOS: Select the clock in the bottom corner, choose your active network connection, and select Information to view network details.
- Linux (Graphical Interface): Go to Settings > Network (or Wi-Fi), and click the gear icon next to your active connection.
- Linux (Terminal): Open the terminal and type
hostname -Iorip addr(checking undereth0for wired networks orwlan0for Wi-Fi). On older distributions, use theifconfigcommand.
Adjusting Display Settings for Multi-Monitor Layouts
When using a television alongside your primary screen, you will need to configure your computer’s display settings so the cursor moves naturally between monitors:
- Windows: Right-click an empty area on your desktop, select Display Settings, and drag the screen icons to reflect their physical arrangement. You can also adjust scale and layout percentages here.
- Mac: Open Apple Menu > System Settings > Displays, then click Arrangement to position your screens and set resolution preferences.
- ChromeOS: Click the bottom clock, select the Settings (gear icon), then navigate to Device > Displays to adjust layout, display size, and orientation.
- Linux: Open Settings > Displays to adjust resolution, screen ordering, scaling, and refresh rates. Command-line users can use the
xrandrutility (e.g., using--output,--mode, and--rateparameters) to manage multi-screen configurations manually.
Optimizing Picture Quality and Reducing Lag
To get the cleanest picture when using a television as a monitor, match your computer’s output resolution to the TV’s native capabilities.
If your computer outputs a 1080p signal while connected to a higher-resolution television, text can appear pixelated or blurry. You can resolve this by navigating into your television’s picture or device settings and locking the output resolution to 1080p (or set it to “Auto”). Computers capable of outputting a native 4K signal will adjust automatically to 4K displays.
To minimize input delay, check your TV’s settings for specific display modes:
- PC Mode: This is the ideal picture preset. It disables unnecessary image processing, keeping refresh rates stable and significantly reducing latency for both wired and wireless setups.
- Game Mode: If your television lacks a dedicated PC mode, Game Mode is the next best choice. It prioritizes low response times and input latency, often unlocking features like Variable Refresh Rate (VRR) via AMD FreeSync or Nvidia G-Sync.
Evaluating Costs: Dedicated Monitors vs. Smart TVs
Choosing a TV over a traditional monitor usually boils down to screen size per dollar spent. Specialized computer monitors carry heavy price premiums for niche performance features, whereas TVs offer expansive screen real estate at budget-friendly prices.
For instance, an advanced gaming display like the 34-inch Alienware QD-OLED monitor retails for roughly $750. In exchange, it offers top-tier performance specs: a 240Hz refresh rate, an ultra-fast 0.03ms response time, and versatile inputs. However, it tops out at a 1440p resolution and lacks integrated speakers or a 3.5mm audio jack.
In contrast, a budget television such as the 32-inch Hisense A4 costs around $110. It delivers full 4K resolution and includes integrated stereo speakers with DTS Virtual:X sound processing. The trade-off comes down to refresh rates: the TV tops out at 60Hz. While 60Hz is plenty for web browsing, office tasks, and video streaming, competitive PC gamers may find it limiting for fast-paced titles.